How to Make Mesh Carrots

Easter and spring are just about here, and so we made the cutest bunch of deco mesh carrots on the block.
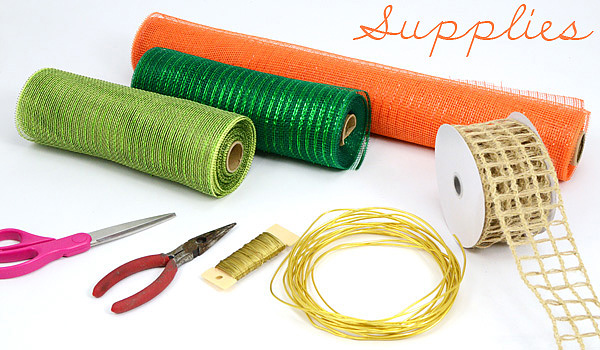
SUPPLIES
21"x10yd Metallic Orange Deco Poly Mesh Roll
10" Metallic Emerald Green Deco Mesh Roll
10" Metallic Moss/Apple Deco Mesh Roll
2.5" Jute Window Pane Mesh Ribbon
Gold Floral Wire (24 Gauge)
Aluminum Craft Wire (2mm)
Scissors & Wire Cutters
To make the three carrots, we used approximately 3 yards of the 21" wide orange deco mesh, and less than 1 yard each of the 10" green deco mesh rolls. About 4 yards of the aluminum craft wire were used, and about 12 feet of the thinner floral wire. A little over 3 yards of the jute ribbon were used.
STEP 1: Make the wire carrot frame
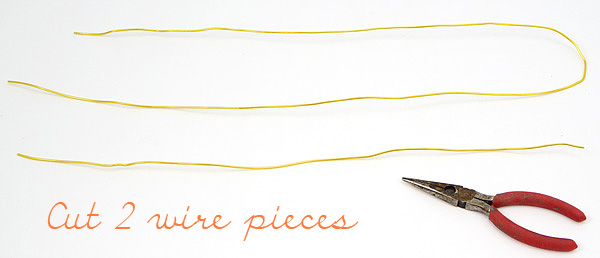
Cut two pieces of the Aluminum Craft wire. One should be twice as long as the other. Our carrots were all slightly different sizes. You should make the two wires 18" and 36" long, give or take a few inches. The finished wire carrot frame just has to fit within the 21-inch wide deco mesh.
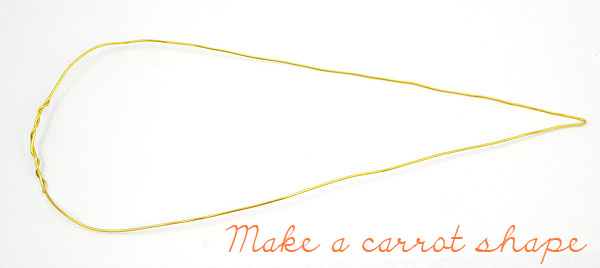
Fold the long wire in half and make a point at the bend for the carrot's point. For the top of the carrot, connect the two loose ends together by wrapping the wire ends around each other. Push the wire form into a carrot shape as shown above.
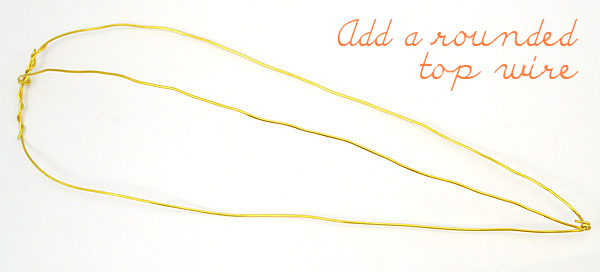
To make the carrot three-dimensional and not flat, use the short length of wire and attach it lengthwise to the carrot shape. It should stand up a few inches higher than the flat carrot shape.
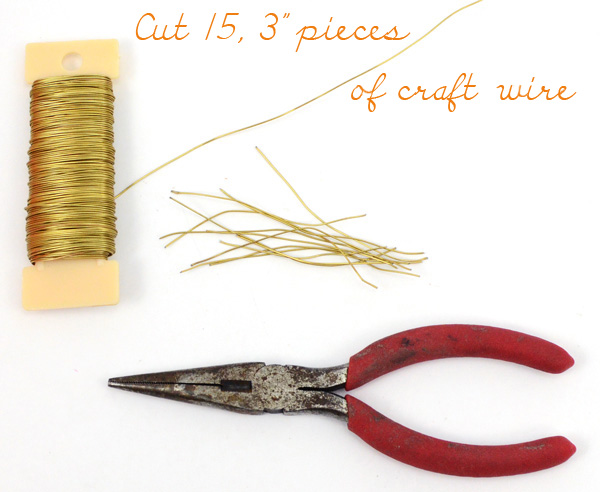 You will eventually need short wire ties to attach the deco mesh to this carrot frame. Use the thinner floral wire and cut about 15, 3-inch pieces.
STEP 2: Cover the frame with deco mesh
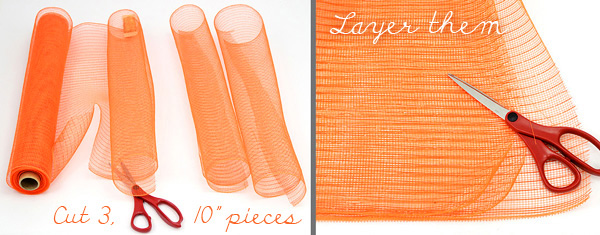
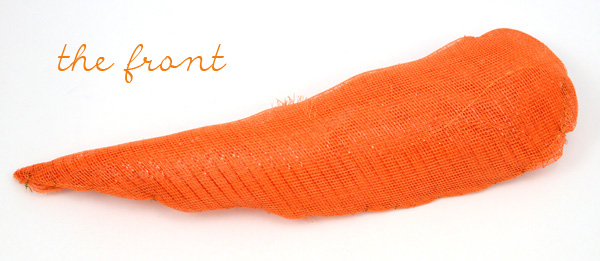
Using the 21"x10yd roll of metallic orange deco mesh, cut 3 pieces that are about 10-inches wide, or wide enough to go around the front of the carrot. Layer or stack evenly on top of each other.
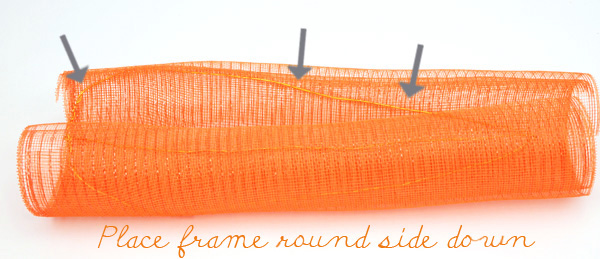
With the mesh placed curl side up, put the wire frame inside the curl. This is where you can see why the wire frame can be no wider than 21-inches, the width of the deco mesh roll.
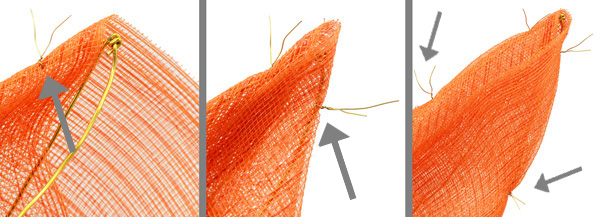
Starting at the carrot tip, use pieces of the floral wire you cut to attach the mesh to the wire frame. Work from the back of the carrot, and poke the floral wire through the layers of mesh and around the wire frame. Twist the floral wire to secure. Go back and forth from each side, working your way up to the carrot top. You will need a wire every few inches.
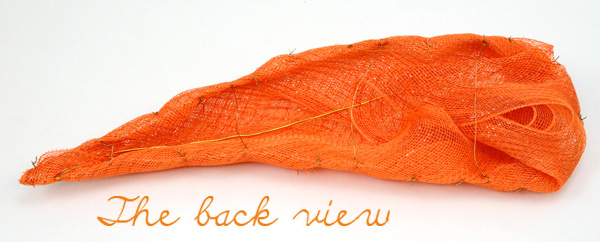
This is the finished back view of the carrot. Go back and add more floral wire where needed. Tuck the extra mesh under the middle wire frame. You can also tie some floral wire across the back to help make the form sturdier.
Trim the extra floral wire sticking out or tuck into the mesh at the back to hide it. Now your carrot is bendable as well.
STEP 3: Make the green carrot tops
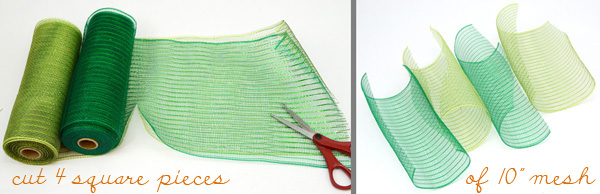
Using the two rolls of the emerald and moss/apple 10" wide deco mesh, cut 4 square pieces and place them curl side up.
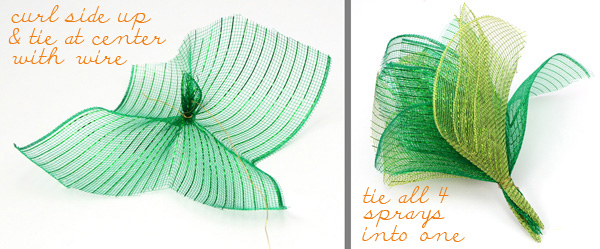
Going one at a time, tie the center of the mesh with a length of floral wire. The wire should be about 2-inches from the bunched tip. Then tie all four sprays together to make one bigger bunch.
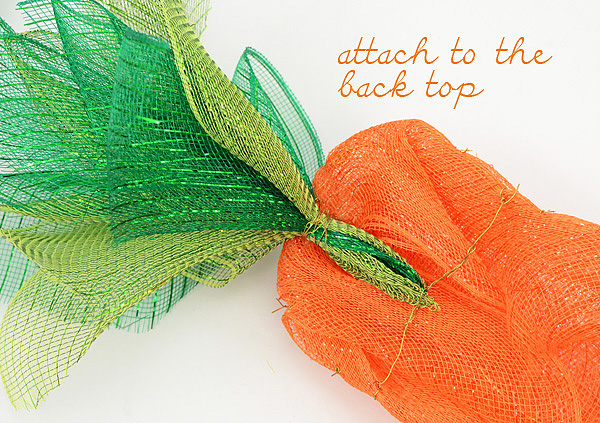
Now attach the bunch to the back top of the carrot, using more floral wire to secure.
STEP 4: Make 2 more Carrots and Tie with Jute Ribbon
Repeat the steps above to make two more carrots. They can be slightly different shapes and sizes like the ones we made.
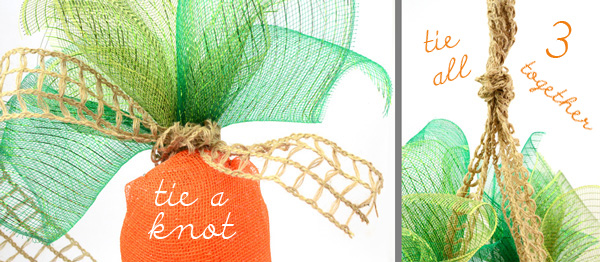
Cut 3 pieces of the Jute Ribbon that are each about 1 yard long. For each carrot, tie one ribbon around the top. Then tie a knot to secure all three carrots together.
http://ave21.com
OPEN A FREE STORE ON AVE 21 MARKETPLACE